
Extended Double Crochet: Complete Stitch Guide
Learn extended double crochet with clear steps, turning chains, tension tips, troubleshooting, stitch variations, and project ideas for confident crocheters.
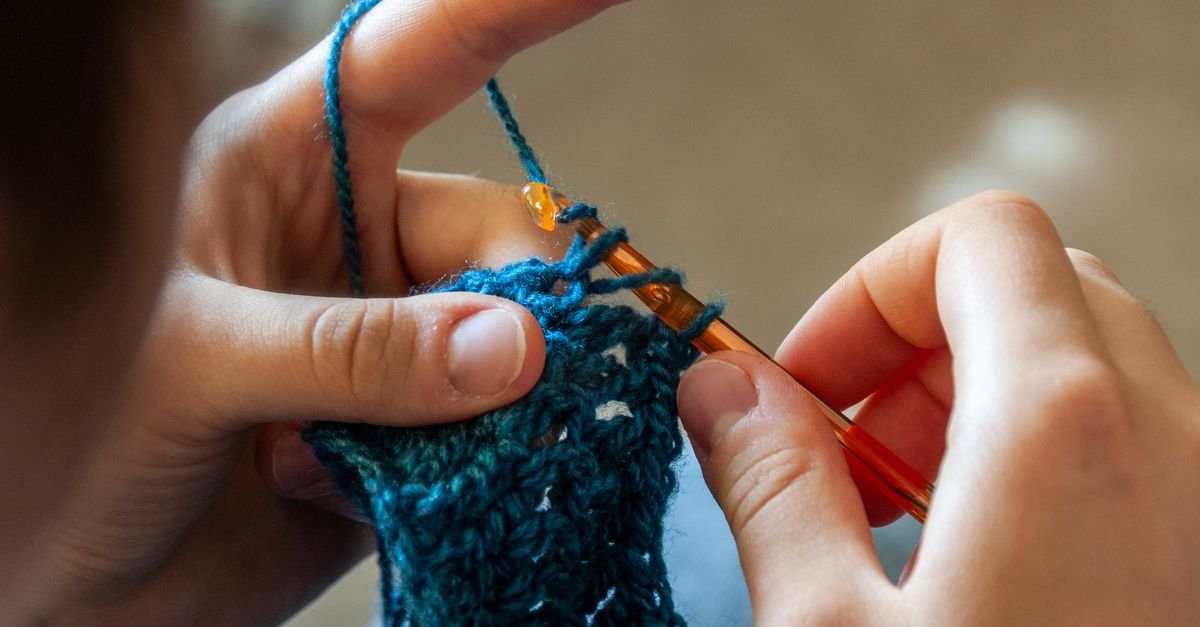
Extended double crochet is a wonderfully useful stitch when you want the height of a double crochet with a little extra length and a more open, flexible fabric. I think of it as a relaxed bridge between familiar stitch heights: it works up quickly, creates attractive vertical lines, and gives simple projects a touch more drape without requiring a complicated pattern repeat.
In this complete guide, I’ll walk through how to make extended double crochet, explain what changes compared with a standard double crochet, and share practical tips for even tension, turning chains, swatching, shaping, and fixing common mistakes. I’ll use US crochet terminology throughout, so if a pattern uses UK terms, check its terminology key first. Our guide to crochet abbreviations can also help when you encounter unfamiliar shorthand in a written pattern.
Table of Contents
What is extended double crochet?
Extended double crochet is a taller variation of double crochet made by adding one extra chain-like step before completing the stitch. That additional step gives the stitch more height than a standard double crochet and creates a fabric with a slightly more open appearance.
In many patterns, extended double crochet is abbreviated as edc, although abbreviations can vary. Always read the pattern’s stitch key before beginning, particularly if the designer gives a special explanation or uses a different name. The stitch is sometimes described as an elongated double crochet because the extra step lengthens the post.
The finished fabric depends on your yarn, hook, tension, and the way you work the turning chain. As with any taller stitch, a tight crocheter may produce a denser fabric, while a loose crocheter may create a more open fabric. That’s why I recommend making a small swatch before using extended double crochet in a garment, blanket, or fitted accessory.
Extended double crochet is useful when you want rows to build height efficiently but don’t want to move all the way to a taller stitch such as treble crochet. It can work beautifully in open textures, striped fabric, mesh-like designs, and projects where a little extra drape matters. For comparison, you can explore a treble crochet stitch guide to see how increasing stitch height changes the look and rhythm of a fabric.
How do you make extended double crochet?

You make extended double crochet by yarning over, inserting the hook, pulling up a loop, yarning over and drawing through one loop, then completing the stitch in two more steps through two loops at a time.
- Yarn over once.
- Insert the hook into the indicated stitch or space.
- Yarn over and pull up a loop. You now have three loops on the hook.
- Yarn over and draw through one loop. This creates the extended step.
- Yarn over and draw through two loops.
- Yarn over once more and draw through the final two loops.
After the final step, one loop remains on your hook and the extended double crochet is complete. The most important part to notice is step four. With a regular double crochet, you usually yarn over and draw through two loops at that point. With the extended version, you draw through only one loop first, which adds height before the remaining two pull-throughs.
I find it helpful to say the movement aloud while practicing: yarn over, insert, pull up, through one, through two, through two. That rhythm keeps the extra step from disappearing when you’re working quickly. Practice a row of stitches in a smooth, light-colored yarn so you can see each loop clearly.
How is extended double crochet different from double crochet?
Extended double crochet differs from double crochet because it includes an extra pull-through-one-loop step before the usual two pull-throughs, making the completed stitch taller and often more open.
The two stitches begin in the same way: yarn over, insert the hook, and pull up a loop. The difference happens after you have three loops on the hook. A standard double crochet draws through two loops twice. An extended double crochet first draws through one loop, then draws through two loops twice.
That small change affects several parts of a project:
- Height: The extended stitch generally creates a taller row than a regular double crochet.
- Fabric: The extra length can make the fabric look more open and may give it additional drape.
- Row count: A project may reach its intended length in fewer rows than one made with a shorter stitch, although the exact result depends on gauge.
- Turning chains: The pattern may use a taller turning chain or may treat the turning chain separately from the first stitch.
- Shaping: Increases and decreases can look more pronounced because each stitch occupies more vertical space.
It’s important not to substitute extended double crochet for regular double crochet without swatching. Even when the stitch count stays the same, the fabric can change in height, width, openness, and edge appearance. A pattern written for one stitch usually relies on that stitch’s specific proportions.
If you are comparing taller stitches, remember that crochet terminology can change between regions. A stitch name in UK terminology may refer to a different height than the same name in US terminology. The abbreviation guide linked above is a useful reference, but the pattern’s own key should always be your first authority.
How should you handle turning chains and row edges?

You should handle turning chains according to the pattern because extended double crochet can need a different starting height from shorter stitches, and the turning chain may or may not count as the first stitch.
There is no single turning-chain rule that fits every pattern. Some designers use a chain that approximates the height of the stitch. Others use a shorter chain to keep the edge from becoming loose, then work the first extended double crochet into the designated stitch. Some patterns count the turning chain as a stitch, while others explicitly state that it does not count.
Read the first-row instructions carefully before making assumptions. Look for wording such as “chain 3, counts as first stitch,” “chain 3, does not count,” or “work an extended double crochet in the first stitch.” These details affect the stitch count and the appearance of the side edge.
If your edges look loose or uneven, compare the turning chain with the height of the first completed stitch. A very loose chain can create a gap at the beginning of every row. A chain that is too short can pull the edge downward. You can experiment on a swatch with a few different chain heights and choose the one that gives you the neatest edge.
Stitch markers can help when a pattern does not count the turning chain. Place a marker in the first or last true stitch of a row, depending on the instructions. This makes it easier to identify where the final extended double crochet belongs and prevents the edge from slowly gaining or losing stitches.
What yarn and hook choices work well?
The best yarn and hook choices depend on the pattern, but smooth yarn with clear stitch definition is usually the easiest place to begin when learning extended double crochet.
Start with the pattern’s stated yarn, hook, gauge, and finished measurements. Changing the yarn or hook can alter the stitch height, fabric density, drape, and project size. If you are designing your own project, make a swatch in extended double crochet rather than relying on a swatch made with a different stitch.
Smooth yarn makes the extra pull-through step easier to see. It also helps you identify the top of each stitch, the spaces between stitches, and the edge loops. Very fuzzy, slippery, dark, or heavily textured yarn can make a new stitch harder to inspect, especially when you are learning to count.
Think about the fabric you want. A smaller hook may create a firmer fabric, while a larger hook may emphasize the stitch’s openness. Neither choice is automatically right or wrong. The useful question is whether the swatch has the structure, drape, and coverage your project needs.
Color can help you study the stitch. A solid shade shows the vertical posts clearly, while alternating rows can make it easier to see the direction of your work. If you enjoy experimenting with texture, browse these beautiful crochet stitches for ideas about combining stitch heights, open spaces, and surface detail.
Extended double crochet can also be useful in lightweight wearables. If you are planning a handmade accessory, compare the fabric with the intended use before committing. The same stitch may feel airy in one yarn and much more substantial in another. For wearable inspiration, you can also browse this crochet socks pattern guide and think about how stitch texture and flexibility affect comfort, even though a sock design may use different stitches.
How can you keep your tension even?
You can keep extended double crochet tension even by maintaining a consistent loop height, avoiding a tight first pull-through, and checking your swatch for both stitch count and fabric feel.
The extra step is where tension often changes. Some crocheters pull the loop too high during the first pull-through, creating a loose, stretched stitch. Others draw through one loop too tightly, making the stitch look pinched. Try to keep the loops on your hook at a comfortable, consistent height rather than pulling them sharply upward or downward.
Pay attention to the yarn over as well. A loose yarn over can make the stitch taller than the surrounding stitches, while a tight one can compress the fabric. Let the hook move smoothly through each step instead of tugging the yarn after every pull-through.
Work several rows before judging your tension. The first row can look uneven because you are still settling into the stitch. After a few repeats, lay the swatch flat and inspect the fabric. Look for consistent stitch height, straight sides, even spaces, and a surface that suits your project.
Count stitches at the end of every row while you practice. Extended double crochet is tall enough that a missed stitch can create a noticeable gap, and an accidental increase can make the edge flare. Mark the first and last stitch if you tend to lose track of the row ends.
Remember that gauge is not just a number. The swatch also tells you how the fabric moves, folds, stretches, and feels in your hand. If the measurement is close but the fabric is too stiff or open for the project, adjust your hook or yarn choice and swatch again.
What patterns and textures can you create?
You can use extended double crochet in plain rows, stripes, mesh patterns, open textures, ripple designs, and combinations with shorter or taller stitches.
A simple fabric made entirely from extended double crochet is a good practice project because you can focus on consistent stitch construction. Once the motion feels natural, try pairing the stitch with chains to create open spaces. Working into chain spaces can produce a lighter fabric and gives you an opportunity to practice reading the structure of a row.
Alternating extended double crochet with shorter stitches creates visible height changes. You might use a shorter stitch along an edge and extended double crochet in the center, or alternate rows to make subtle horizontal texture. When you combine stitch heights, swatch carefully because the row height may change from one section to the next.
Stripes are another approachable option. A color change after a few rows can emphasize the stitch’s vertical lines and make a plain scarf or wrap feel more graphic. Keep notes about the color order and fasten off according to the pattern’s instructions so the edges remain tidy.
For a more decorative surface, combine extended double crochet with clusters, shells, or fans. The taller stitch can give those motifs extra height and a more open outline. Count the spaces carefully, particularly when a repeat includes several stitches worked into one location.
Be thoughtful about using raised textures on items that will be handled or worn frequently. A stitch may look striking in a swatch but feel different when repeated across a large area. Let the intended use guide your choices rather than selecting a stitch only because it looks impressive in a photograph.
How do you use extended double crochet for shaping?
You use extended double crochet for shaping by placing increases or decreases where the pattern indicates and checking the stitch count after every shaping row.
An increase may be made by working two extended double crochets into the same stitch or space, although the exact method belongs to the pattern. A decrease may combine two or more partial stitches into one completed stitch. Because extended double crochet is taller, shaping can affect the silhouette quickly.
When increasing, watch the base of the stitch closely. It can be easy to work into the wrong loop or accidentally add an extra stitch beside the turning chain. When decreasing, keep the partial stitches at a consistent height so the joined area does not become noticeably tight or loose.
Mark shaping points before you begin the row. For symmetrical projects, place markers at the center or at both sides so you can compare the left and right sections. After the row, count the total stitches and check that the fabric lies flat without unexpected ripples or pulling.
If you are shaping a triangle, shawl, sleeve, hat, or garment panel, take measurements at regular intervals. Don’t wait until the final edge to discover that the project is growing faster or slower than planned. A small adjustment early in the work is much easier than rebuilding a large section.
What common mistakes should you avoid?
You can avoid common extended double crochet mistakes by checking the extra pull-through step, counting stitches, identifying the correct insertion point, and correcting errors as soon as you notice them.
- Accidentally making a regular double crochet: After pulling up the loop, remember to draw through one loop before working through two loops twice.
- Pulling through too many loops: The extended step passes through one loop only. Pulling through two at that point changes the stitch.
- Working into the wrong place: Check whether the pattern directs you into a stitch, chain space, or turning chain.
- Missing the final stitch: Mark the edge stitch or count every row so the project does not gradually narrow.
- Creating loose row edges: Adjust the turning chain and keep the first and last stitches at a consistent height.
- Skipping the swatch: Stitch height can change the project’s finished dimensions even when the stitch count is correct.
If a row looks wrong, compare it with the previous row before unraveling. Find the first point where the stitch structure changes. In many cases, you only need to undo a small section rather than the entire row.
It can help to keep a small practice swatch beside your project. Use it to compare a regular double crochet with an extended double crochet, test turning chains, and remind yourself how the extra step feels. This is especially useful when you return to a project after a break.
How should you practice this stitch?
You should practice extended double crochet with a small swatch, a simple rectangle, or a striped sample before using it in a larger project.
Begin with a foundation that gives you enough stitches to see the edges clearly. Work several rows, counting each one, and focus on the six-step motion. Don’t worry if the first few stitches are uneven; your hands need time to learn where the extra step belongs.
Next, try a swatch with a turning chain that counts as the first stitch and another where it does not, if your pattern gives you that choice. Comparing the edges will help you understand why written instructions are so specific about turning chains.
Then experiment with a small color change or a row of chain spaces. These variations let you see how the stitch behaves in different structures without requiring a large amount of yarn. Write down your hook, yarn, stitch count, and any tension observations.
When you feel ready for a project, choose something with a straightforward shape and clear instructions. A scarf, wrap, simple panel, or swatch-based sampler lets you concentrate on the stitch instead of managing complicated shaping. Once you’re comfortable, you can explore more adventurous combinations and adapt the stitch to your own designs.
If you want to practice reading stitch instructions alongside your new technique, our guide to crochet pattern abbreviations is a useful reference. Keep the pattern key nearby and write out any unfamiliar abbreviation in full before beginning.
What should you do next with extended double crochet?
Your next step is to make a small extended double crochet swatch, compare its height and drape with regular double crochet, and record the hook and yarn combination that gives you the fabric you want.
Once the stitch feels familiar, try changing one feature at a time: work in stripes, add chain spaces, combine the stitch with shorter stitches, or use it in a simple shaped panel. Keep your notes so you can repeat the results or adjust them in a future project.
The extra pull-through is a small technique change, but it opens up plenty of design possibilities. With steady tension, careful counting, and a little curiosity, extended double crochet can become a reliable stitch for airy textures, flowing fabric, and projects that need a little more height and movement.