Free Directions for Crochet Hats: Easy Step-by-Step Guide
Learn free directions for crochet hats with a flexible step-by-step method for choosing yarn, shaping the crown, crocheting the sides, and adding a brim.

These free directions for crochet hats are designed to help you make a simple, comfortable hat while leaving room for your own yarn, color, and style choices. Instead of memorizing a rigid stitch count that only suits one yarn and one head size, I’ll show you how to build a hat from the top down and check the fit as you go.
This approach works especially well if you’re new to crocheting in the round. You’ll practice a magic ring or joined starting chain, increase stitches to shape the crown, work even rounds for the sides, and finish with an optional brim. If you’re still learning how to hold your yarn or recognize stitches, my guide to crochet for absolute beginners is a helpful place to review the basics first.
Table of Contents

What makes these free directions for crochet hats beginner-friendly?
These free directions for crochet hats are beginner-friendly because they use a simple top-down construction and encourage you to check the size as you work. A hat made this way grows in three clear stages: a flat crown, straight sides, and a finishing edge.
The biggest advantage is flexibility. Crochet tension varies from person to person, and different yarns create very different fabrics. A fixed stitch count may produce a snug hat for one crocheter and a loose hat for another. By measuring the crown and trying the hat on during the process, we can make useful adjustments before the project is finished.
You’ll mainly need to know the chain stitch, slip stitch, single crochet, and double crochet. You can make the entire hat with one stitch if you prefer, or use a taller stitch for faster growth and a softer fabric. Keep your first version simple. Once the construction feels familiar, stripes, texture, colorwork, ear flaps, and decorative flowers become much easier to explore.
Gather your yarn and crochet tools
You only need a few supplies to begin, and your yarn label can guide you toward a suitable hook. Choose a yarn that feels comfortable against the head and has enough structure to hold the shape of a hat. Smooth yarn in a light or medium color is often easier to work with when you’re learning because the stitches are easier to see.
- Yarn in the weight and fiber you prefer
- A crochet hook recommended on the yarn label
- Scissors
- A yarn needle
- A stitch marker or a scrap of contrasting yarn
- A measuring tape, if available
Before starting, make a small sample with the stitch you plan to use. This isn’t only about gauge in the formal pattern-testing sense; it gives you a chance to notice whether the fabric feels stiff, loose, stretchy, or comfortable. If the fabric is too firm, try a larger hook. If it is too open for the look you want, try a smaller hook.
Keep in mind that a hat needs some stretch to sit comfortably, but it shouldn’t feel so loose that it slides down. A fabric with a little give is usually more forgiving than a rigid one.
Start the free directions for crochet hats

Begin the crown with either a magic ring or a short chain joined into a ring. The magic ring gives you a tightly closed center, while the chain-ring method can feel more comfortable if you’re not yet confident with adjustable loops.
- Make your starting ring and place your hook through the center.
- Work a first round of evenly spaced stitches into the ring.
- Join the round with a slip stitch if you are using joined rounds.
- Place a marker at the beginning of the next round.
For a classic beginner hat, single crochet creates a dense, sturdy fabric, while double crochet produces a lighter fabric and helps the project grow more quickly. Half double crochet can sit between those two options. Choose one main stitch for the crown and sides so the shape remains easy to follow.
When working in joined rounds, begin each round with the turning chain recommended for your stitch. Some crocheters count that chain as a stitch and some do not, so follow one method consistently. If you prefer a less visible seam, you can work in continuous rounds instead, but be sure to move your stitch marker as you go.
Keep the center of the crown flat as it grows. The exact number of increases depends on your stitch, yarn, hook, and tension, so watch the fabric rather than relying on an inflexible number. If the crown curls upward like a bowl, add more increases in the next round. If it becomes wavy or ruffled, space the increases farther apart or work fewer of them.
Increase the crown and check the shape
Continue adding stitches around the crown until the flat circle is wide enough for the top of the intended hat. The crown should spread outward without dramatic ripples, and it should lie reasonably flat when placed on a table.
A simple increase routine looks like this:
- Work one round with increases distributed evenly around the circle.
- Work the next round with the increases spaced farther apart.
- Repeat the process, extending the spaces between increases as the crown grows.
- Pause regularly to check whether the circle is still flat and balanced.
You don’t have to place every increase in exactly the same position. Staggering them can reduce visible lines and create a smoother crown. However, keep the increases reasonably even so one side doesn’t become fuller than the other.
To check the size, measure across the crown or compare it with the head it is intended to fit. Remember that the finished hat will gain additional width when you work the sides, so don’t continue increasing after the crown already looks oversized. If you’re making the hat for someone else, a measurement is more reliable than guessing from age or general size labels.
This is also the best moment to change your hook if the fabric isn’t behaving as expected. Adjusting now is much easier than undoing the entire hat later.
Work the sides of the hat without increasing
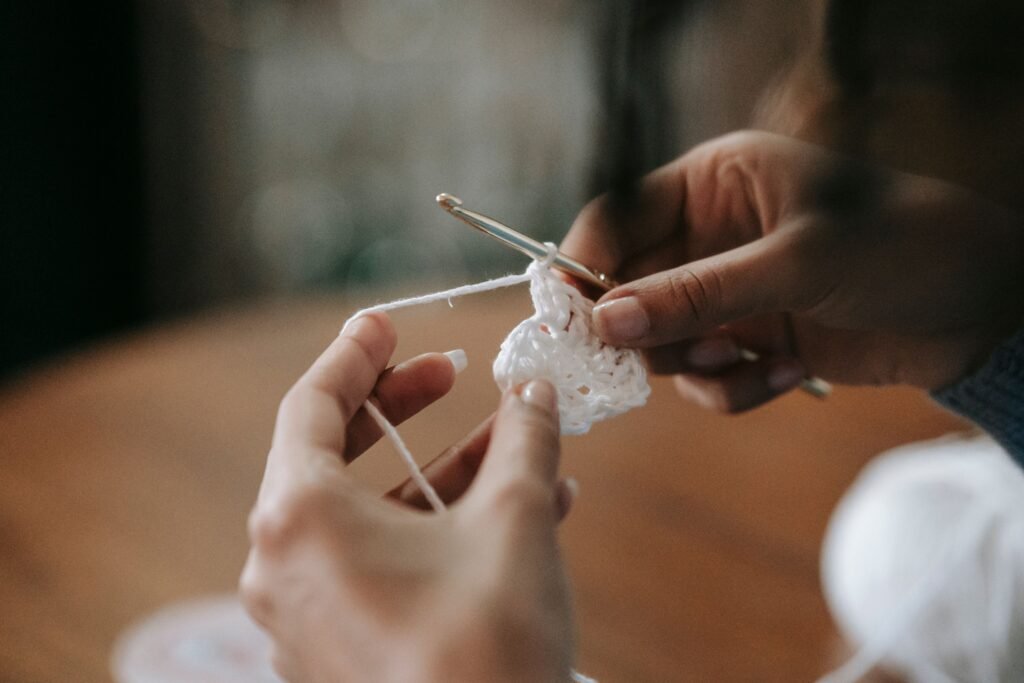
Once the crown is wide enough, work rounds without increases to create the sides of the hat. This is the stage where the flat circle begins to curve downward and take on a recognizable hat shape.
Continue using the same stitch, keeping your tension as even as possible. If you’re working joined rounds, pay attention to the seam and turning chain. If you’re working continuously, check the beginning of each round so the sides don’t gradually lean.
Try the hat on occasionally, placing it gently over the head without stretching it excessively. The sides should come down far enough for the intended style. A close-fitting beanie may stop higher, while a slouchier shape needs more length. If you’re making a hat with ear flaps, leave the sides slightly shorter and add the flaps after the main body is complete.
Color changes are easy to add at this stage. You can make a solid hat, alternate rounds, create wider stripes, or reserve a contrasting shade for the brim. To make a tidy color change, finish the final pull-through of the previous stitch with the new color, then continue the next round. Weave in the ends as you go if you dislike having many tails waiting at the end.
For texture, try alternating front-loop and back-loop stitches, adding a simple ribbed section, or working a raised stitch pattern. Keep the crown uncomplicated until you know how the texture affects the fabric’s width and stretch.
Add a comfortable brim and finish the hat
Add the brim after the sides reach the length you want. A brim can be as simple as several rounds of the same stitch, or it can use a ribbed texture that gives the lower edge more stretch.
For a straightforward brim, work even rounds around the lower edge and keep your tension relaxed. For a ribbed effect, work stitches through only one loop of the previous round. The exact loop you use changes the ridges and flexibility, so make a small test section if you’re unsure which side of the fabric you prefer.
- Join your yarn at the lower edge if you changed colors.
- Work the first brim round evenly around the hat.
- Continue for as many rounds as suit the style and fit.
- Join the final round neatly, then fasten off.
- Use a yarn needle to weave the tail through the wrong side of the fabric.
- Trim the remaining end only after it is secure.
Try the hat on once more before hiding every end. The brim should feel secure without pinching. If it is too tight, remove a brim round or redo it with a slightly larger hook. If it is too loose, use a firmer tension or add a structured edging.
For a folded brim, work additional rounds and turn the edge upward. You can sew the fold in place with a yarn needle, or leave it flexible so the wearer can adjust it. A pom-pom, crocheted flower, button, or small embroidered detail can personalize the finished hat. If you enjoy adding flowers to accessories, the layered shaping in this crochet poppy flower guide offers an inspiring decoration idea.
Adjust the fit and solve common hat problems
The most useful hat-making skill is learning to read the fabric. When something looks wrong, pause and identify whether the problem comes from increases, tension, or the overall length.
The crown curls upward
A curling crown usually needs more width. Add increases in the next round and check whether the circle relaxes. If you’re using a dense stitch, a slightly larger hook may also help create a more flexible fabric.
The crown has ruffles
Ruffles usually indicate too many increases for the yarn and stitch combination. Work a round with fewer increases, or work one or more even rounds before increasing again. A little waviness can disappear as the hat curves, but pronounced ripples generally need correcting.
The hat is too tight
First check whether the fabric has enough stretch. If the stitches are very firm, try a larger hook. You can also add a little width to the crown or work more side rounds before adding the brim. Avoid stretching the finished hat aggressively, since that may distort the stitches.
The hat is too loose
A loose hat may need a smaller hook, fewer crown increases, or a firmer brim. If only the lower edge is loose, adjust the brim rather than remaking the entire project. If the crown itself is oversized, undoing a few rounds near the top is usually the cleanest correction.
The hat leans or has a visible seam
A slight seam is normal in joined-round crochet, but a strong lean may come from misplaced increases or uneven turning chains. Count the stitches around a few rounds and check that your increases are distributed rather than clustered. In future rounds, stagger the increase positions or try continuous rounds.
If you need to refresh basic stitch handling before making corrections, return to the beginner crochet basics and practice a small swatch first. A few minutes of practice can make the main hat much less frustrating.
Explore more crochet hat ideas
Once this basic construction feels comfortable, use it as a starting point rather than a limit. Make the crown in one color and the sides in another, add stripes that reflect a favorite team or season, or use a textured brim for contrast. You can also create matching hats by keeping the construction the same and changing only the yarn colors and finishing details.
For a flower hat, attach a small motif near the brim. For a winter-inspired style, add ear flaps and ties. For a slouchy version, work extra side rounds before finishing. A folded brim can make the same hat look more structured, while an unworked edge creates a softer silhouette.
I recommend keeping notes while you crochet: the yarn used, the hook, where you stopped increasing, and how many side rounds you worked. Those details make it much easier to repeat a successful fit later. You can also record what you would change next time, since every project teaches you something about your tension and preferences.
When you’re ready to experiment with shaped crochet pieces, you may enjoy exploring a different construction in this crochet calla lily pattern guide. It isn’t a hat pattern, but its focus on shaping and assembly is a useful reminder that crochet projects can be built from simple stages.
Start your first hat with a yarn you can see clearly, increase slowly, and check the fit before moving on. Once the crown, sides, and brim become familiar, you’ll have a reliable foundation for designing hats that feel like your own.