How to make the Beste Poppy Flower
Learn how to crochet a Poppy Flower with clear guidance on yarn, petals, shaping, assembly, color, and creative ways to use your finished bloom.
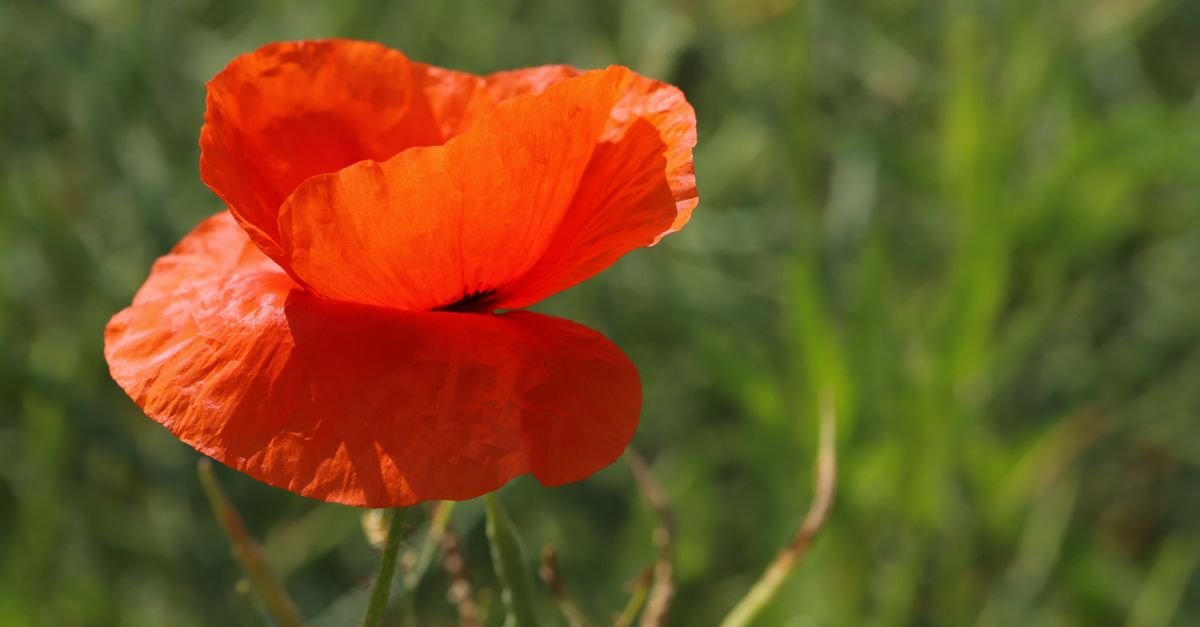
A crochet Poppy Flower is a small project with plenty of personality. Its open petals, dark center, and gently ruffled edges make it recognizable even when you simplify the construction. In this guide, I’ll walk you through a flexible way to make the Beste Poppy Flower while leaving room for your own choices in color, texture, and size. You won’t need a complicated chart to begin; a comfortable understanding of chains, slip stitches, single crochet, and increases is enough to get started.
Table of Contents
This is an adaptable flower-making method rather than a rigid one-size-fits-all recipe. Yarn thickness, hook choice, tension, and the number of petals you build will all change the final result. That’s part of the fun. We can make a delicate little flower for a hair accessory, a fuller bloom for a wreath, or several matching flowers for a bouquet.

What makes a crochet Poppy Flower look like a poppy?
A crochet Poppy Flower looks convincing when three details work together: broad petals, a contrasting center, and a little natural irregularity around the edges. The petals do not need to be perfectly flat. A slight curl or ripple usually makes the flower feel more organic.
Before picking up your hook, decide what mood you want the finished flower to have. A vivid red flower with a deep center creates a traditional look, while dusty pink, cream, coral, or burgundy can give the same shape a softer or more unusual character. You can also use two shades of the same color, keeping the inner petals darker and the outer petals lighter.
I recommend thinking about the flower in layers:
- The center: a small, firm circle that anchors the petals.
- The inner petal layer: shorter petals that sit close to the center.
- The outer petal layer: larger petals that create the open silhouette.
- The finishing details: a dark middle, small stitches, or a few embroidered accents.
If you’re new to crochet, it may help to review the basics in this guide to crochet for absolute beginners before beginning. Being comfortable with tension and working into a foundation chain will make the flower much more relaxing to assemble.
Gather yarn and tools for the Beste Poppy Flower

The best materials for this project are the ones that let you see your stitches clearly and shape the petals without fighting the yarn. Smooth yarn is generally easier to control than highly fuzzy yarn, especially when you’re forming small curves and joining several pieces.
- Yarn for the petals in your chosen poppy color
- A contrasting yarn for the center
- A crochet hook that works comfortably with your yarn
- Scissors
- A yarn needle for joining and weaving in ends
- A stitch marker, safety pin, or scrap of contrasting yarn
- Optional stuffing, a small button, or embroidery thread for the center
Use the yarn label as your starting point for hook guidance, then adjust if your stitches feel too tight or too loose. For a flower that holds its shape, a slightly firm fabric can be useful, but don’t force the hook through tight stitches. If the yarn splits easily, slow down and use the tip of the hook to separate the strands.
You can make every part from one yarn type, or combine textures for contrast. A smooth petal with a slightly raised center can look especially effective. If you’re planning to attach the flower to clothing or a bag, keep the finished piece light enough that it doesn’t pull the fabric out of shape.
How to crochet the center of the flower
Start the Poppy Flower by making a compact center, because this gives the petals something stable to grow around. You can begin with a magic ring or with a short chain joined into a ring. Choose whichever method feels more familiar.
- Make a small adjustable ring, or create a short chain and join it with a slip stitch.
- Work a round of compact stitches into the ring.
- Close the round neatly and pull the center snug if you used an adjustable ring.
- Leave a yarn tail long enough for joining later.
The center should lie fairly flat rather than forming a deep cup. If it puckers strongly, you may be working too many stitches into a small space or pulling the yarn too tightly. If it looks loose and floppy, use a firmer tension on the next attempt or add another compact round.
For a classic contrast, use a dark center. You can keep it simple, or add texture with small raised stitches around the outside. Another option is to sew a few short lines from the middle outward after the center is attached. These details don’t need to be identical; slight variation can make the flower feel more handmade and lively.
Build the poppy petals one layer at a time
The petals are easiest to control when you make them as separate pieces or as clearly defined sections around a foundation. Making them separately lets you experiment with shape before committing to the final assembly.

Shape a simple petal
Begin with a short chain that represents the base of the petal. Work back along the chain with compact stitches, then add taller stitches toward the middle if you want the petal to widen. Finish with a rounded or pointed end, depending on the look you prefer.
For a rounded poppy petal, increase gradually toward the outer portion and decrease as you return along the opposite side. For a more graphic flower, keep the edges straighter and finish with a gentle point. The important thing is to make the base narrower than the upper section, since the petals need to gather around the center.
Add a soft ruffle
A poppy usually benefits from movement along the outer edge. You can create that movement with a final edging round that places extra stitches along the petal’s widest part. Work the edging loosely so it can ripple without becoming stiff.
If the petal curls too much, flatten it gently with your fingers and reduce the extra stitches on the next one. If it remains completely straight, add a little more fullness to the edge. I find it helpful to make one test petal first, because the right amount of ruffle depends on your yarn and tension.
Repeat for the outer layer
The outer petals should be a little larger than the inner ones, but they don’t have to be dramatically different. A modest change in length or width is enough to create a layered effect. Make as many petals as you need to form a full circle without forcing them to overlap heavily.
Lay the petals on a table as you go. This simple step makes it easier to see whether the flower is balanced. If one petal is much fuller than the others, you can use it at the back or remake it before joining. Don’t worry about making every edge mathematically identical; flowers look more natural when the shapes have a little variation.
Join and shape the Beste Poppy Flower
Assembly is where the separate crochet pieces become a recognizable flower. Take your time here, because a few small changes in placement can transform the final shape.
- Arrange the larger petals in a loose circle with their narrow ends toward the middle.
- Overlap the bases slightly and secure them with a few temporary pins or scrap yarn.
- Sew the petal bases together using the yarn needle and a matching yarn tail.
- Place the smaller petals over the first layer, offsetting them so the gaps below are covered.
- Attach the crochet center over the joined bases.
- Check the flower from the front and adjust the petals before weaving in the ends.
Keep the stitches at the base secure but flexible. If you pull too tightly, the petals may stand upright instead of opening outward. If the flower feels loose, add a few extra stitches through the bases from different directions. This creates a stable anchor without showing much on the front.
Once the flower is assembled, shape each petal with your fingertips. Bend some edges slightly forward and let others sit farther back. You can also pinch the base of a petal to give it a shallow fold. Avoid trying to make the whole flower perfectly flat; a little dimension gives the bloom more presence.
For inspiration about constructing crochet flowers with a more sculptural form, you can also explore this crochet calla lily pattern guide. A calla lily has a different silhouette, but its shaping and assembly ideas can encourage you to think beyond flat motifs.
Ways to customize your crochet Poppy Flower
Once you understand the basic construction, there are many ways to make the flower your own. I especially enjoy changing one design element at a time, so it’s easy to see what affects the finished shape.
- Change the petal proportions: Make the petals short and rounded for a compact bloom, or longer for a more open flower.
- Use two petal shades: A slightly darker inner layer adds depth without requiring extra surface decoration.
- Try a scalloped edge: Small rounded sections can replace a simple ruffle.
- Embroider the center: Add short lines, tiny dots, or a ring of contrasting stitches.
- Make a bud: Use fewer petals and shape them inward around the center.
- Make a larger bloom: Add an extra outer layer, but keep the base secure so the flower doesn’t sag.
- Add a backing: Attach felt, a crocheted circle, or another neat backing before adding a brooch pin or clip.
Color can change the character of the same pattern more than you might expect. Bright shades feel cheerful and graphic, while muted shades create a gentler botanical look. A dark center gives strong contrast, but a center in a related shade produces a softer result.
Fix common problems while crocheting the flower
Small crochet flowers can be fiddly, but most problems have a simple solution. If your petals look uneven, compare the number of rows and increases before assuming the entire flower needs to be remade. Sometimes the difference comes from tension rather than the written steps.
The petals won’t lie flat
This usually means the petal has too much fullness in one area or the stitches are being pulled tightly. Gently reshape it first. If the problem remains, undo the final edging and work it with fewer added stitches or a looser hand.
The flower looks too small
Instead of immediately changing the entire pattern, try making the outer petals longer or adding a second outer layer. You can also use a heavier yarn, but remember that the final flower may become heavier as well.
The center disappears
If the petals cover too much of the center, spread them apart before sewing. You can also make the center slightly larger or add a raised ring around it. A strong contrast between the center and petals will help it remain visible.
The flower feels floppy
Check the joins first. The petal bases need enough stitches to hold their position. If the flower is still soft, add a backing circle or a small amount of discreet support behind the center. Keep the front flexible so the petals still look natural.
Finish and use your handmade Poppy Flower
Before calling the flower finished, inspect both sides and weave in every loose end securely. Trim the tails only after you’re satisfied with the shape. Give the petals one final adjustment, then decide how you want to use the bloom.
A single flower can decorate a hat, scarf, tote bag, hair clip, gift wrap, or home accessory. Several flowers can become a garland, wreath, table arrangement, or a small bouquet. If you’re making a wearable piece, attach the flower firmly and consider adding a backing so the stitches don’t rub directly against the fabric.
You can also leave the flower unattached until you’ve made a few versions. This gives you the freedom to compare colors and sizes before choosing a final project. Keep your first sample nearby as a reference, then let later flowers become experiments rather than exact copies.
The Beste Poppy Flower is a wonderful project for practicing shape, layering, and confident finishing. Start with a simple center and a few petals, then let the details develop as you work. Once you’ve made one bloom, try changing the edge, the colors, or the proportions and see where the yarn leads you next.